One of the greatest losses with digital photography is that we never print our pictures. We share them on social media and on our phones, but we never see them hanging on the wall.
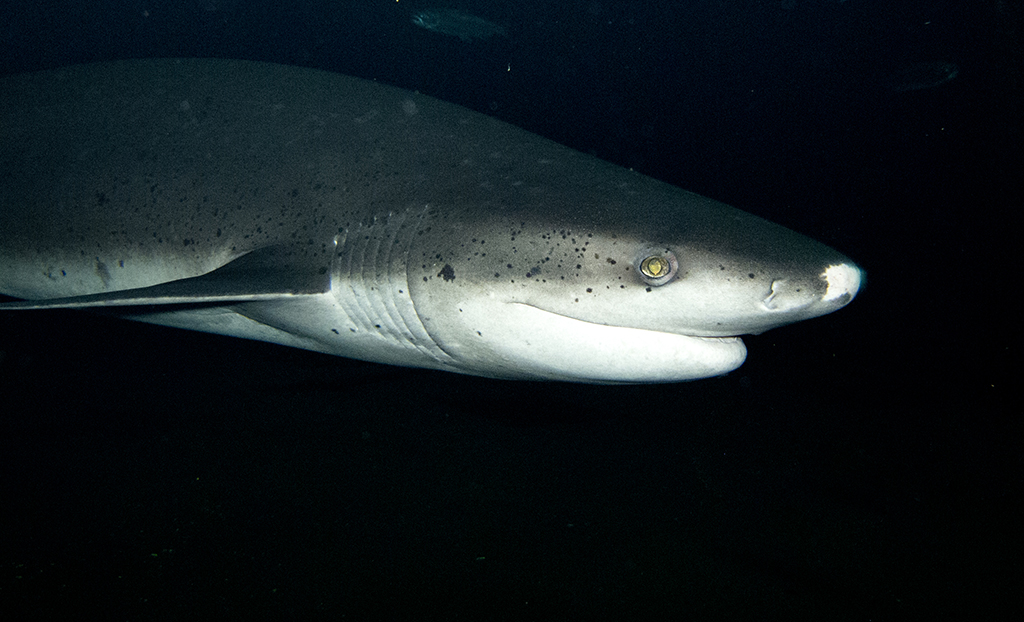
Early in my career in scuba diving, I was fortunate to see a photo show by Ernie Brooks. It was simply black and white photos of air bells underwater. I was mesmerized.
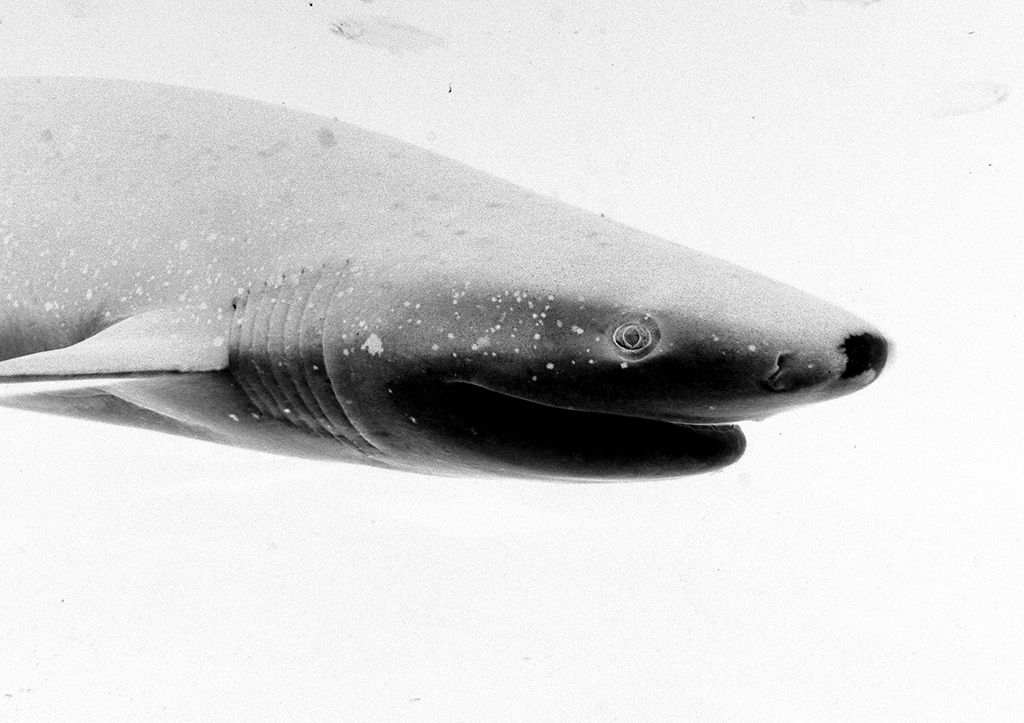
With those two things in mind, I set out to turn my own underwater photography on its ear. I experimented with converting my photos to black and white. I frequently dive in lakes so shifting to black and white didn’t lose much.
While I liked the effect, I thought I could do more.
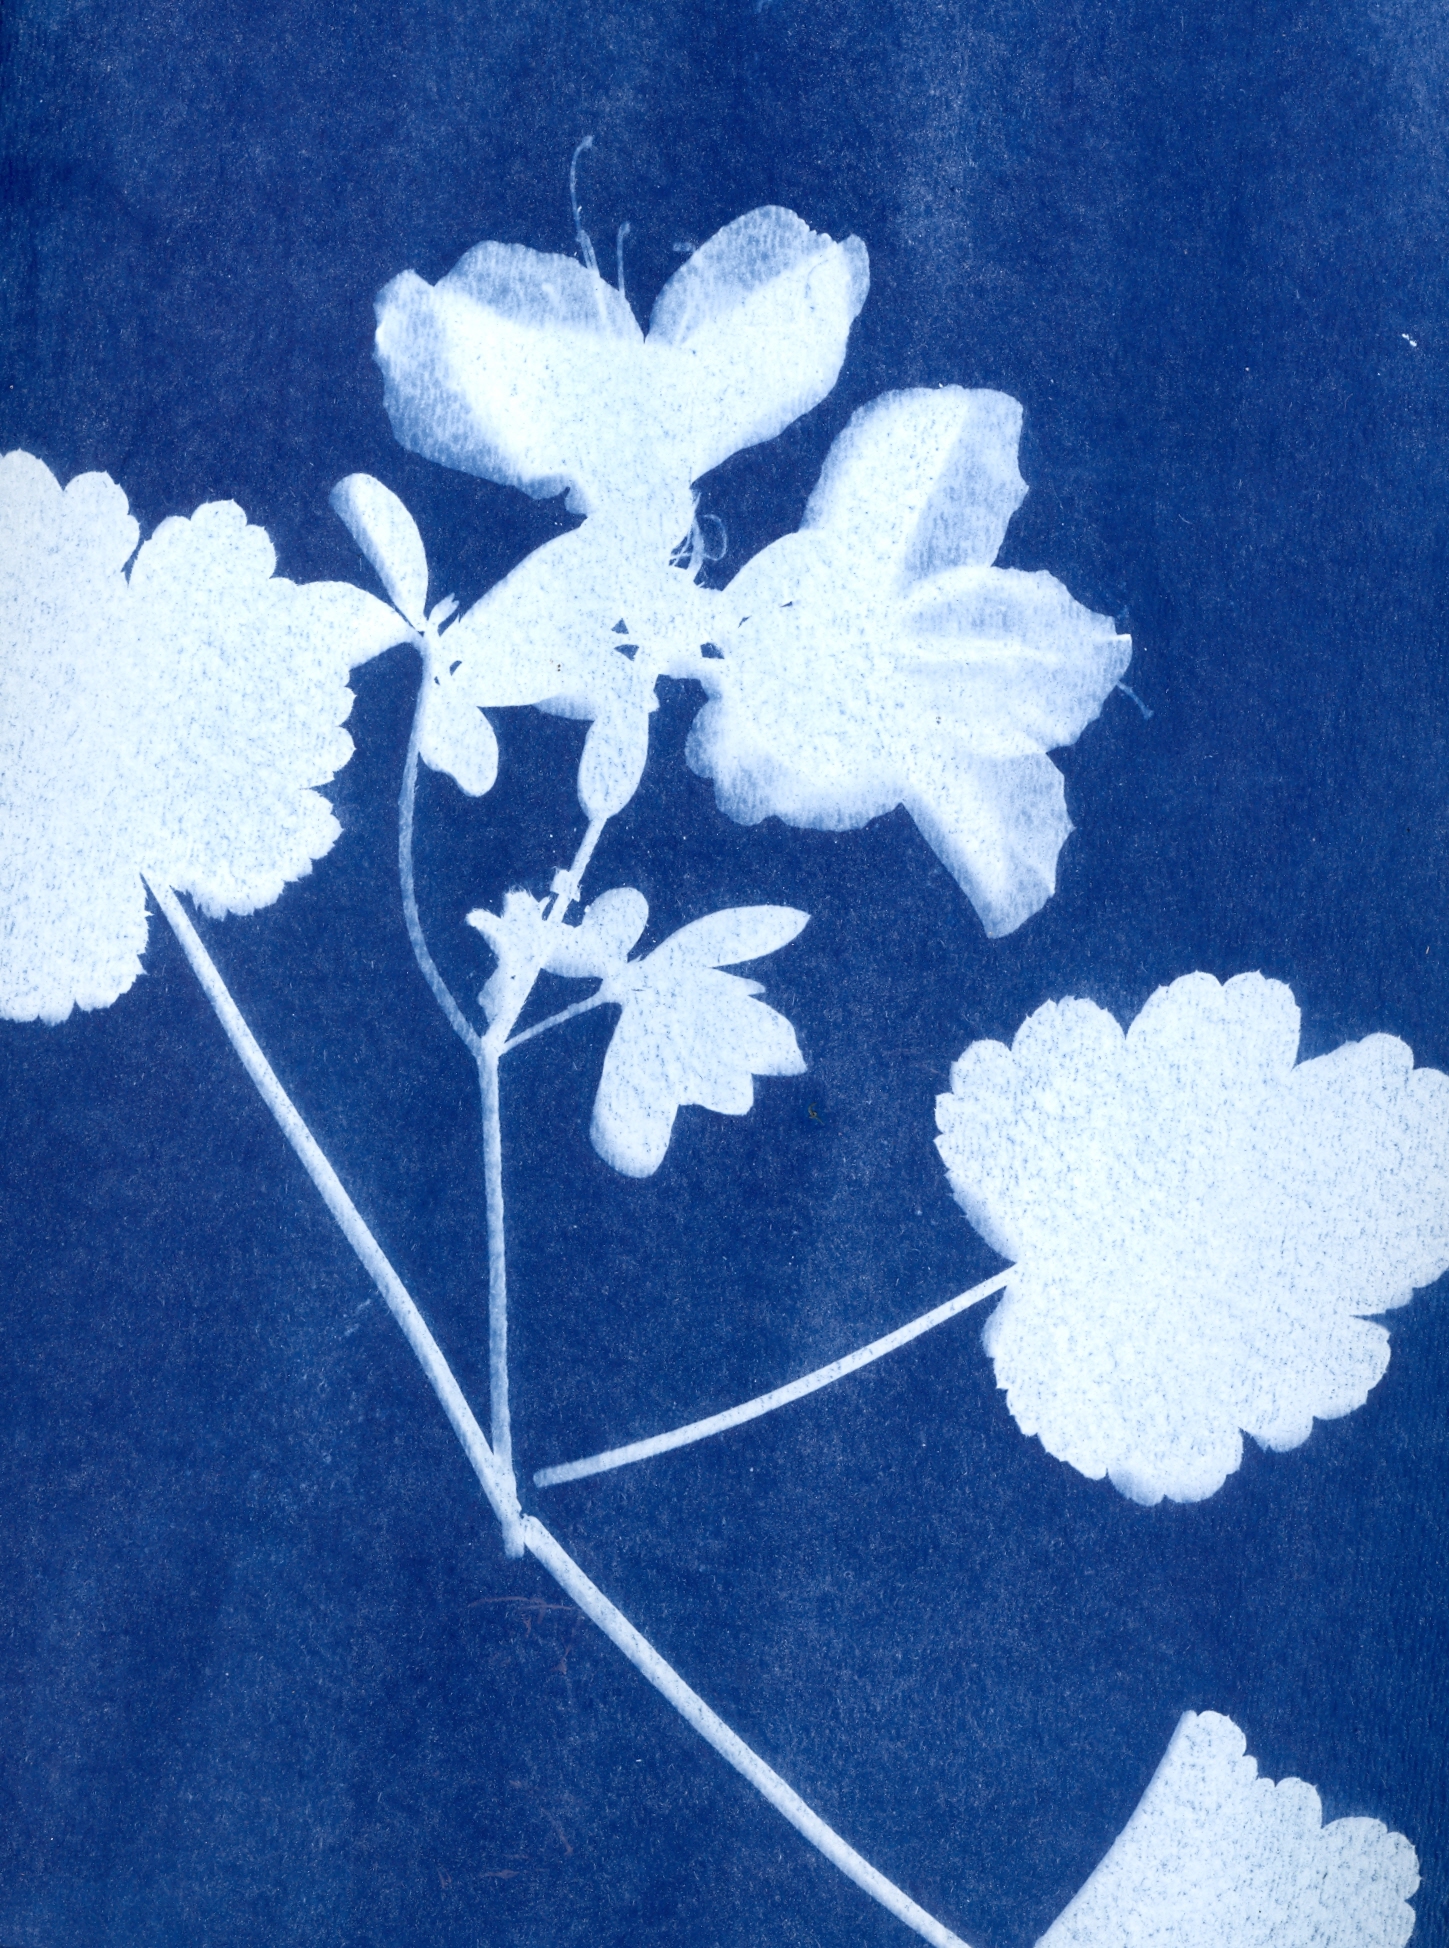
Enter the sunlight print, also known as cyanotype. Cyanotype printing is an original photo printing technique, first used around 1842. Cyanotypes are made by mixing two chemicals (ammonium iron citrate and potassium ferricyanide) and treating paper, cloth or canvas, making it sensitive to ultraviolet light. The sun turns the chemical blue while whatever is shaded stays white.
One of the earliest uses for cyanotype was for naturalists to capture images of plants. The same process is used to create “blue prints” of maps and drawings.
I first learned how to make cyanotypes in a class at the Center for Documentary Studies at Duke University. While there I made contact prints and later experimented with prints of things, like plants, glasses and crystals. Anything that would bend the light.
To make contact prints, you take a digital image (either a scan or a digital photo) and then reverse it in Photoshop. Printed out on a clear paper, it become a full-size negative.
In college, I had learned about black and white photography and printing my own images so this was nothing new. The cool part about cyanotypes that instead of hiding away in a darkroom to make images, you do it in the sun.
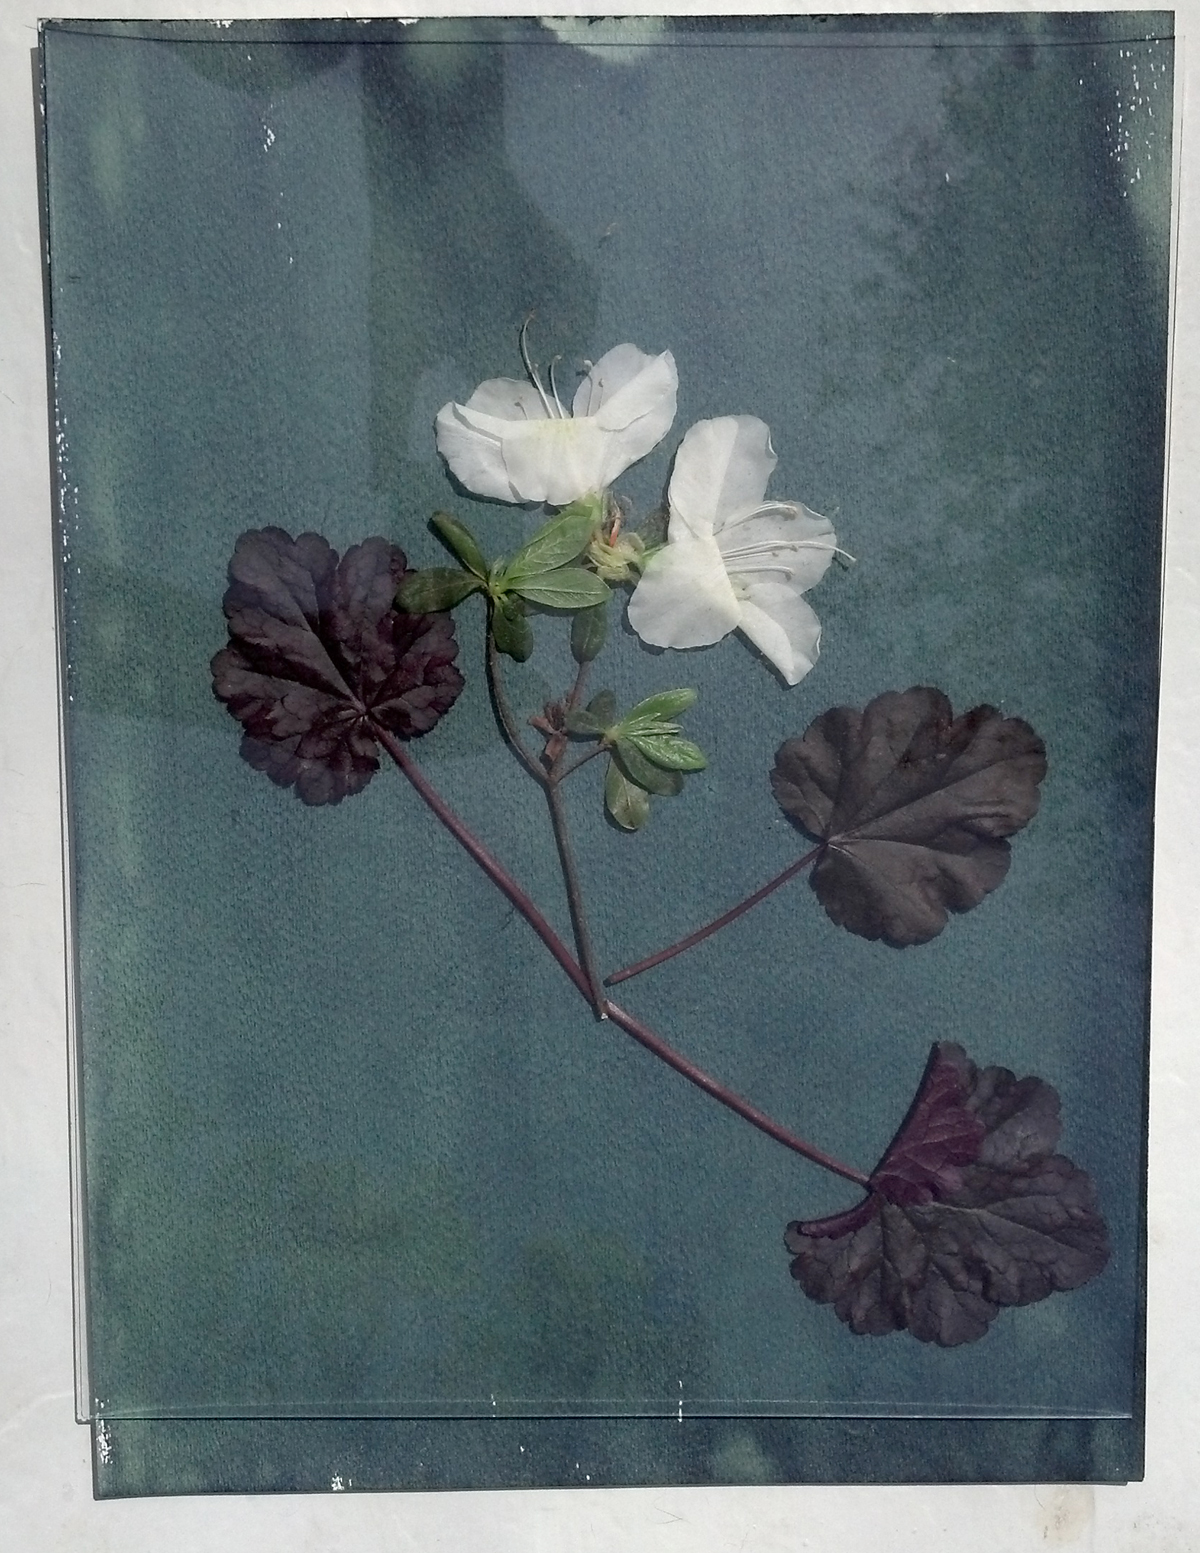
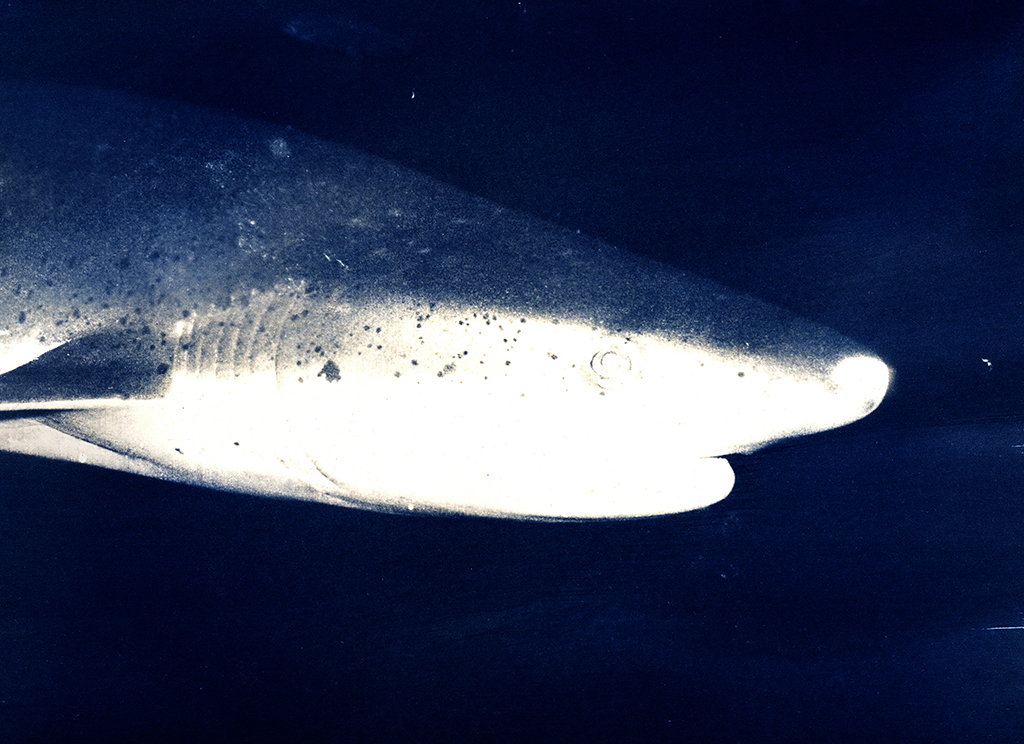
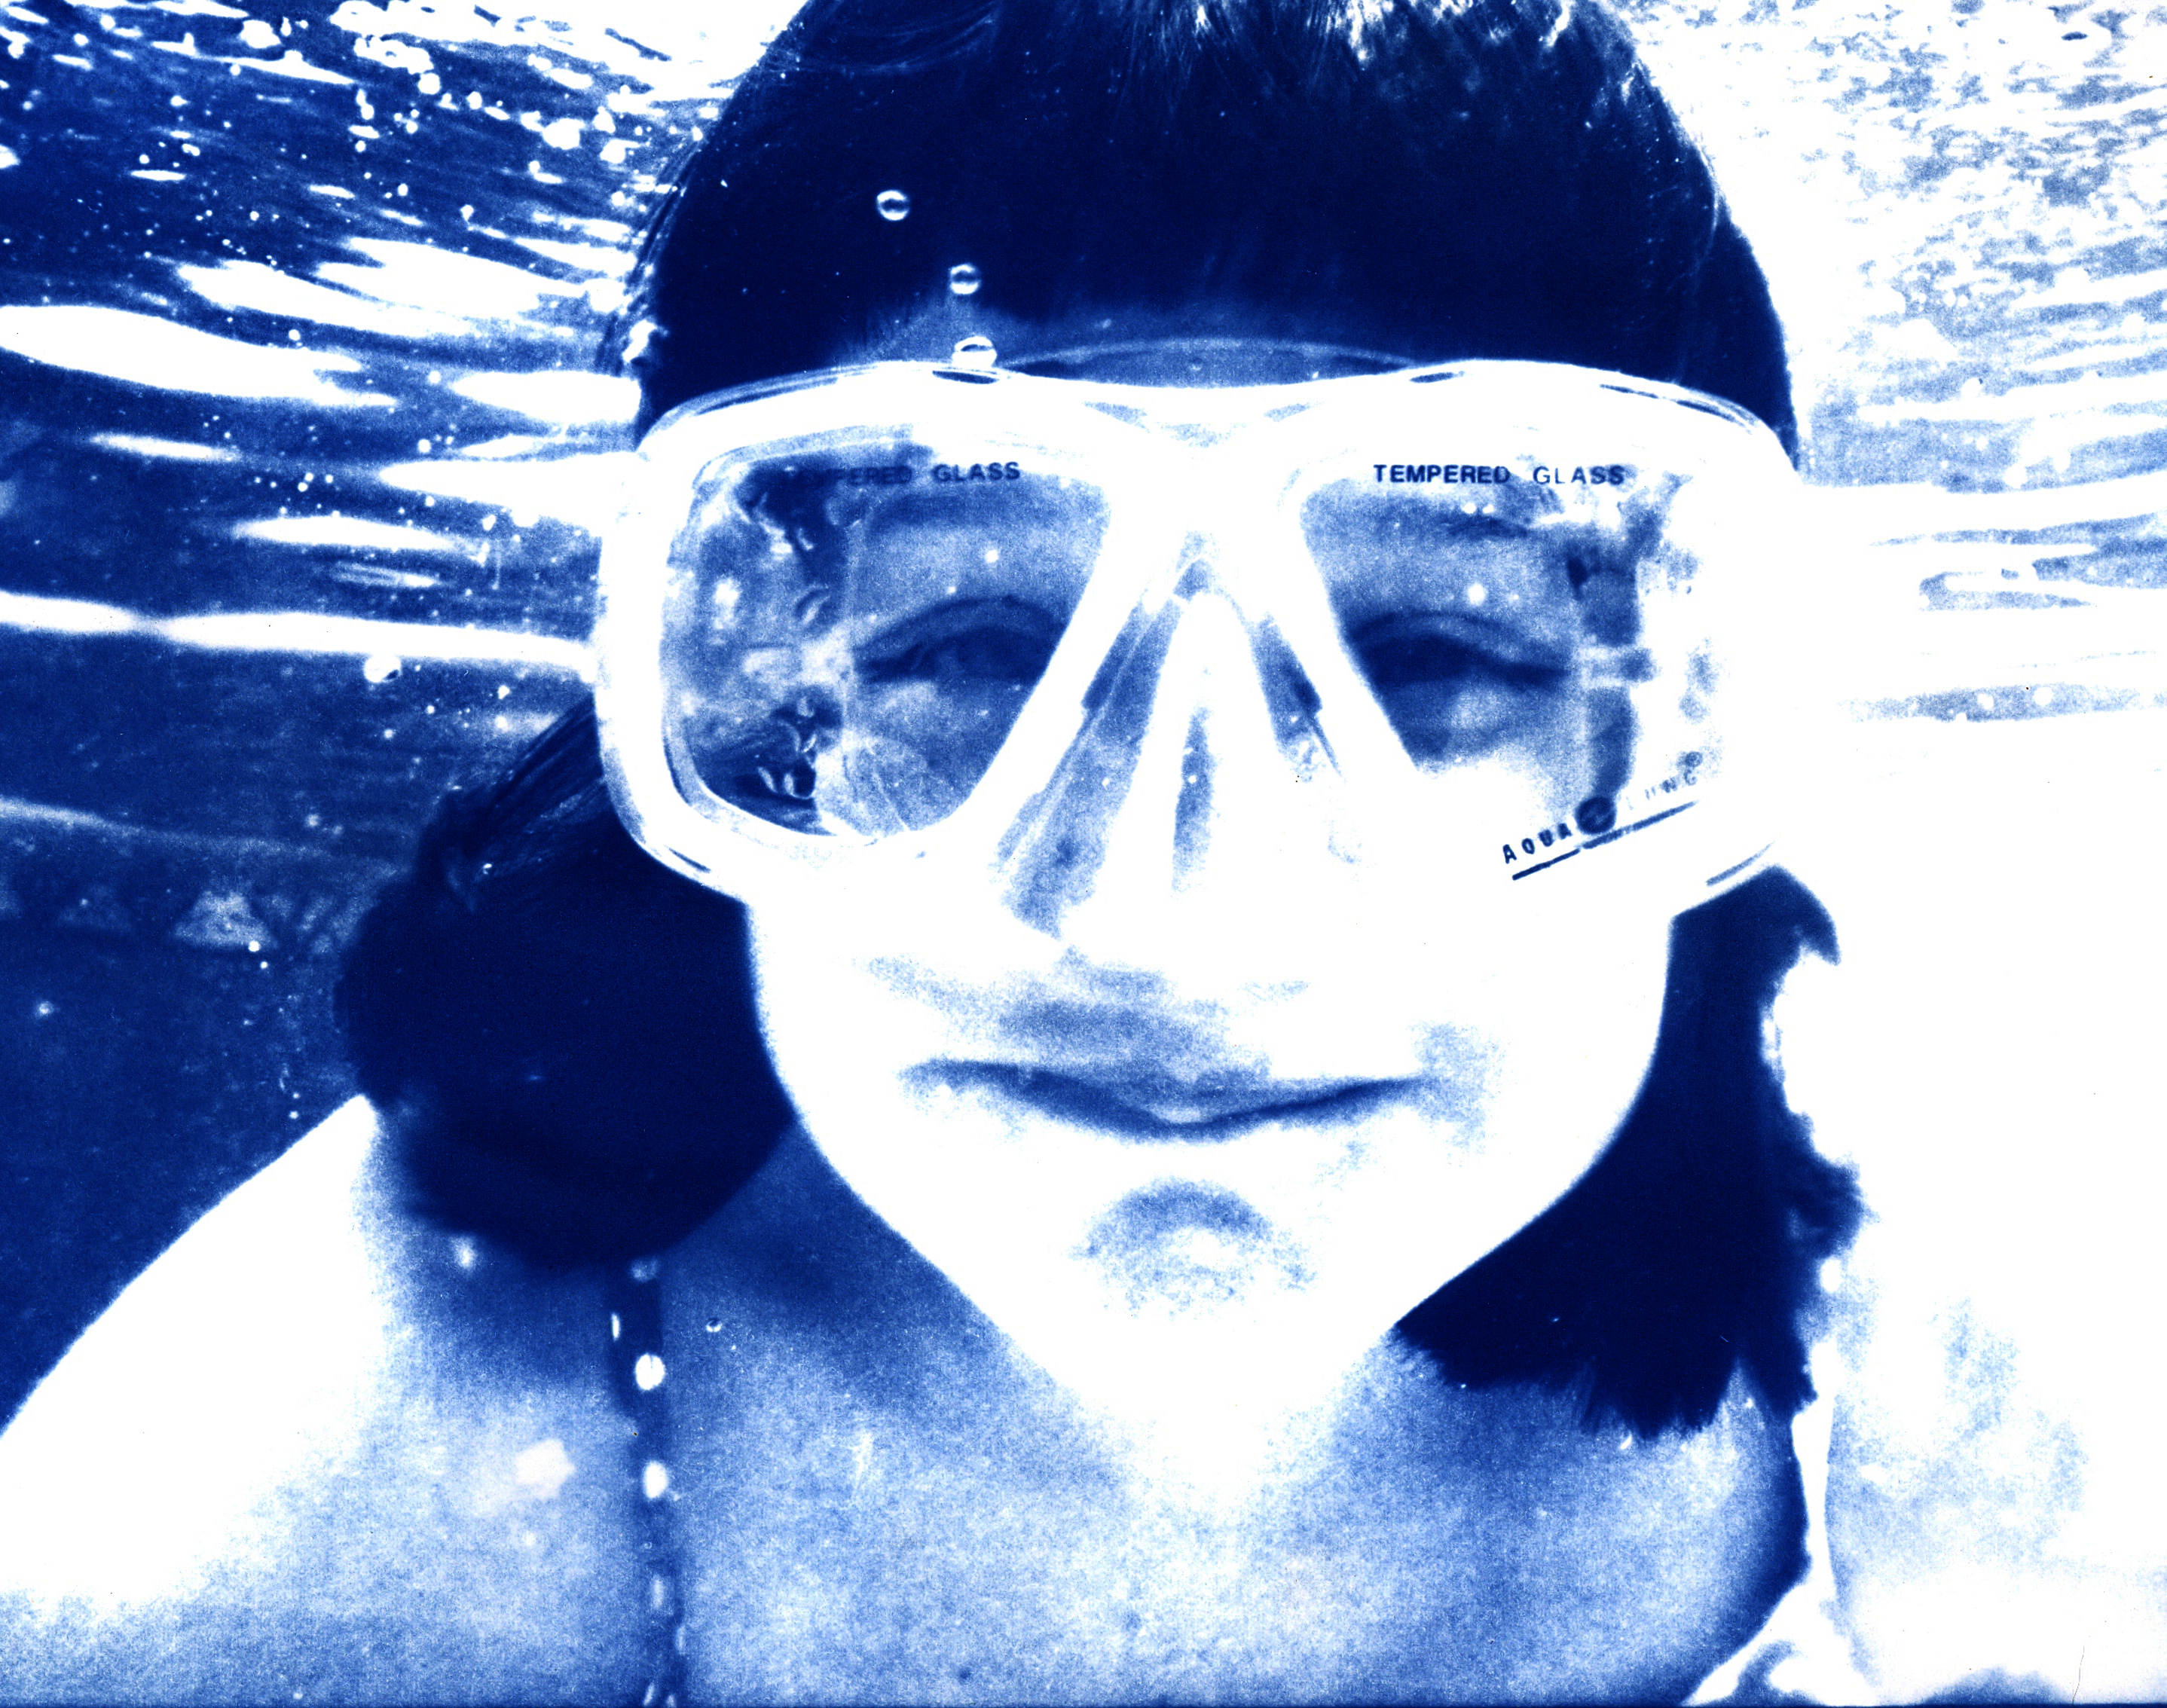
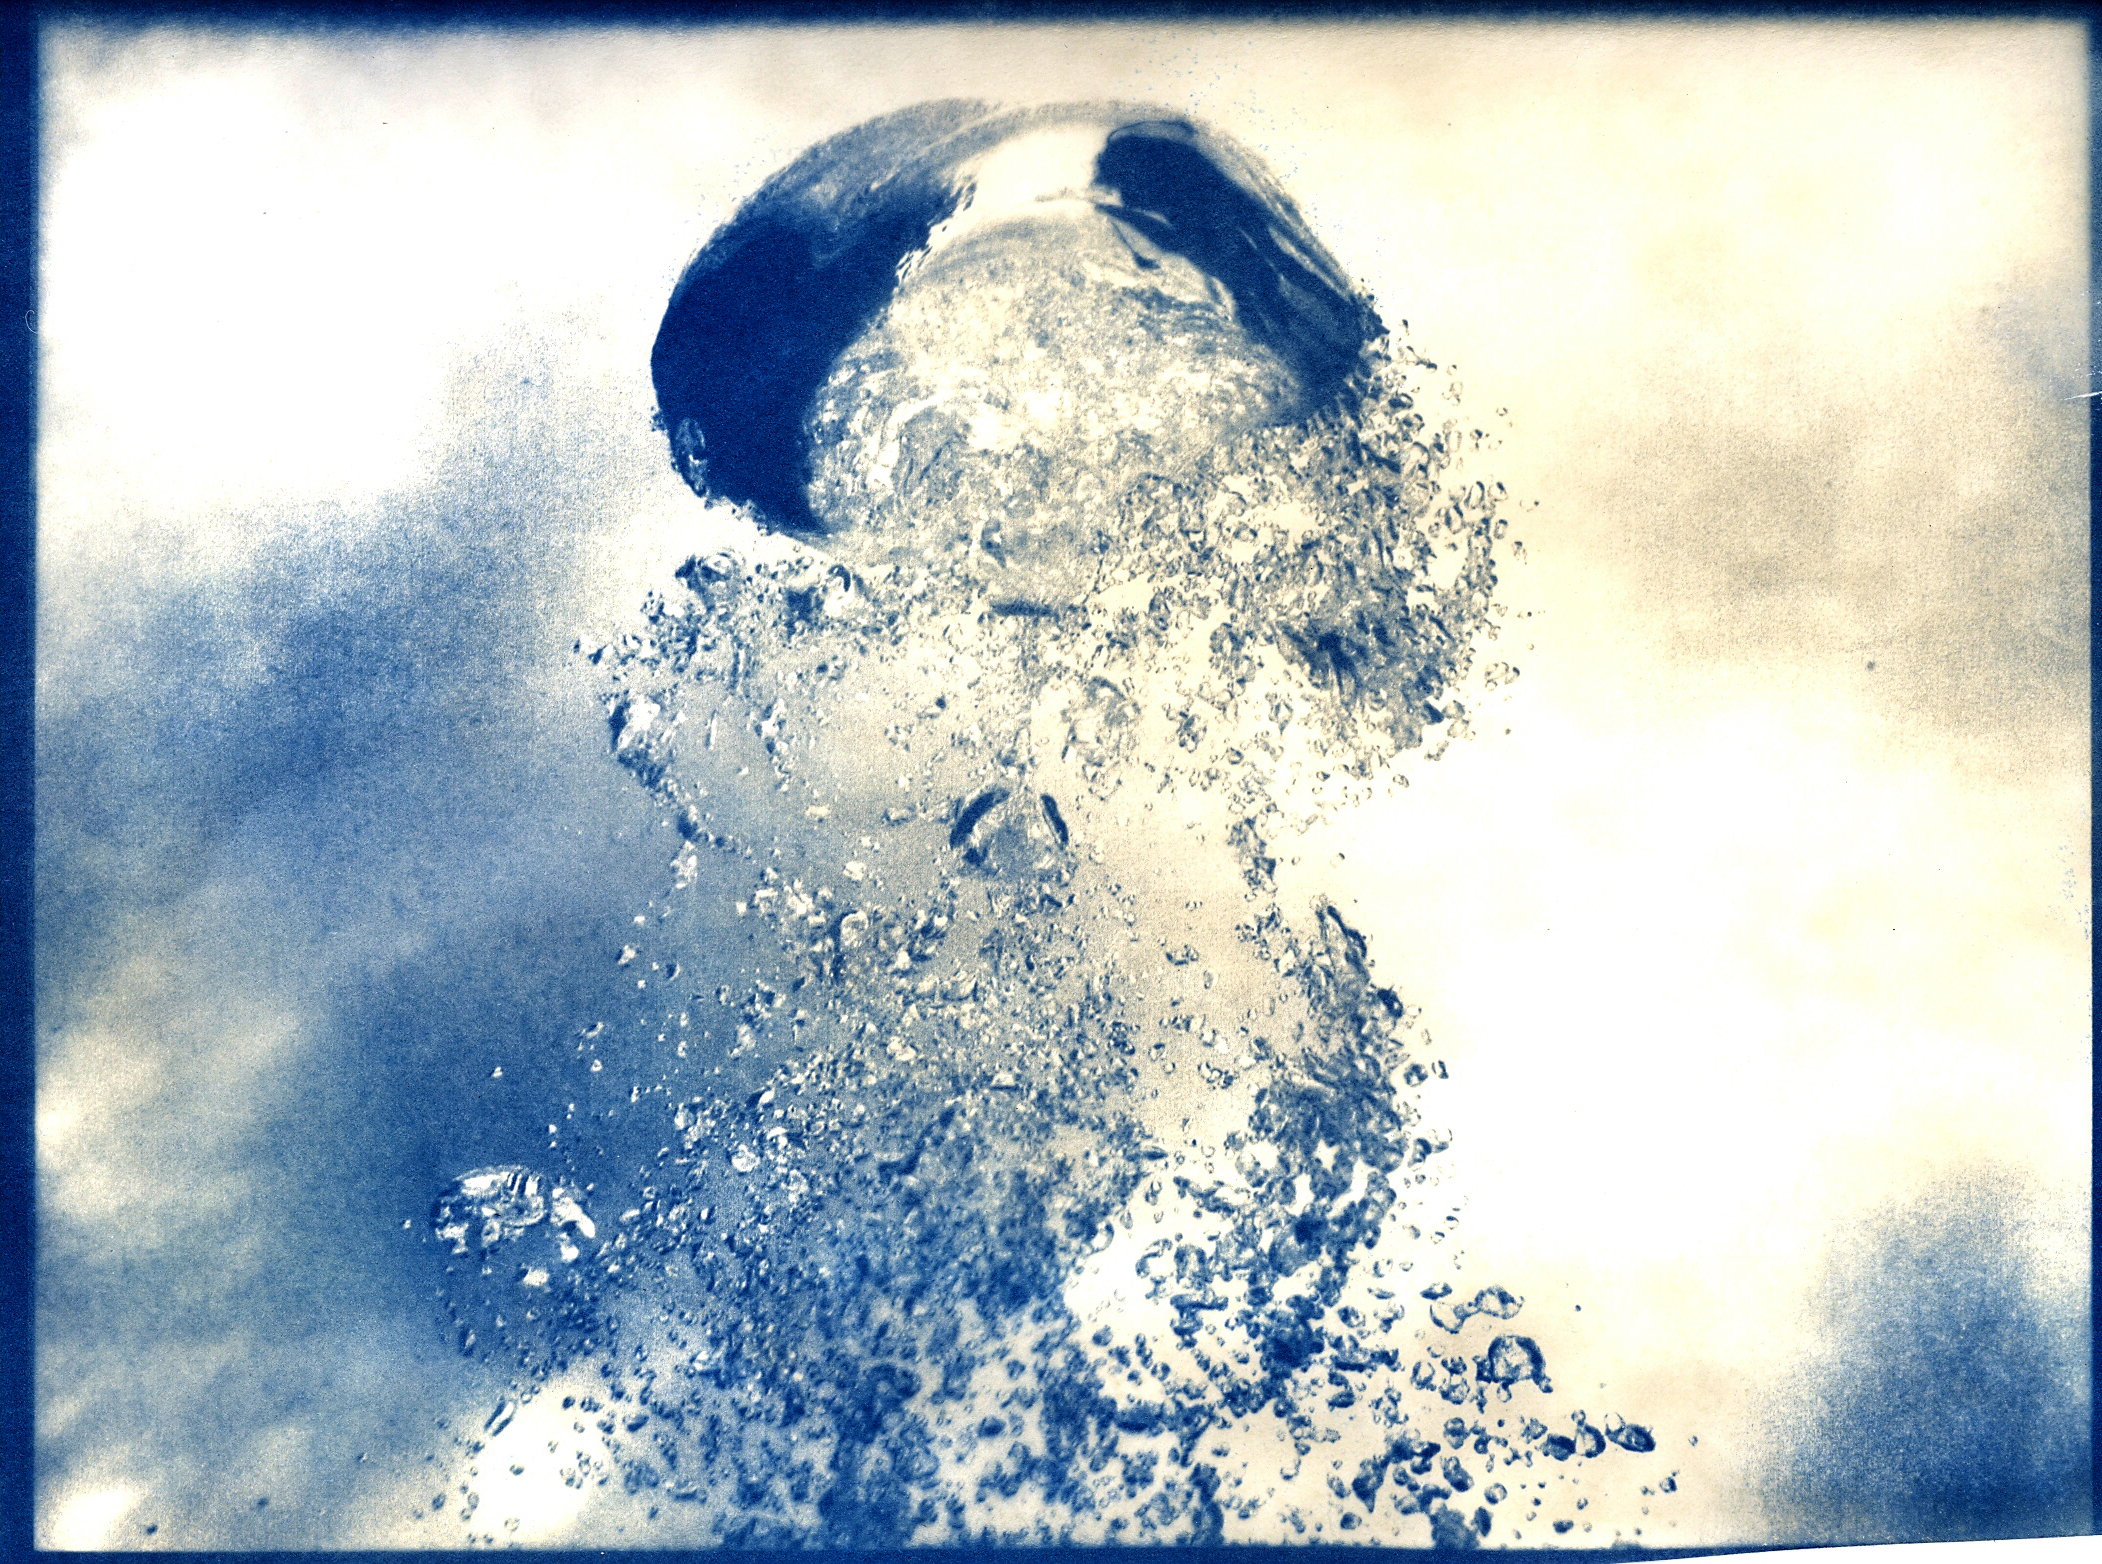
Here are some examples of the work.

How To
- Find images that are sharp and clear, with a simple subject and a clean background.
- Using photo editing software create black and white versions of your photographs.
- Take a critical look at these images. Edit out any that don’t stand up to the loss of color.
- Reverse the image, turning it into a “negative”.
- Print the negative image on a piece of acetate photo paper made for use with inkjet printers.
- This is a contact print so print it out the size you expect from the final cyanotype.
- Mix the chemicals in a glass container, but just a little at a time. Literally, a capful or two of each chemical is enough.
-

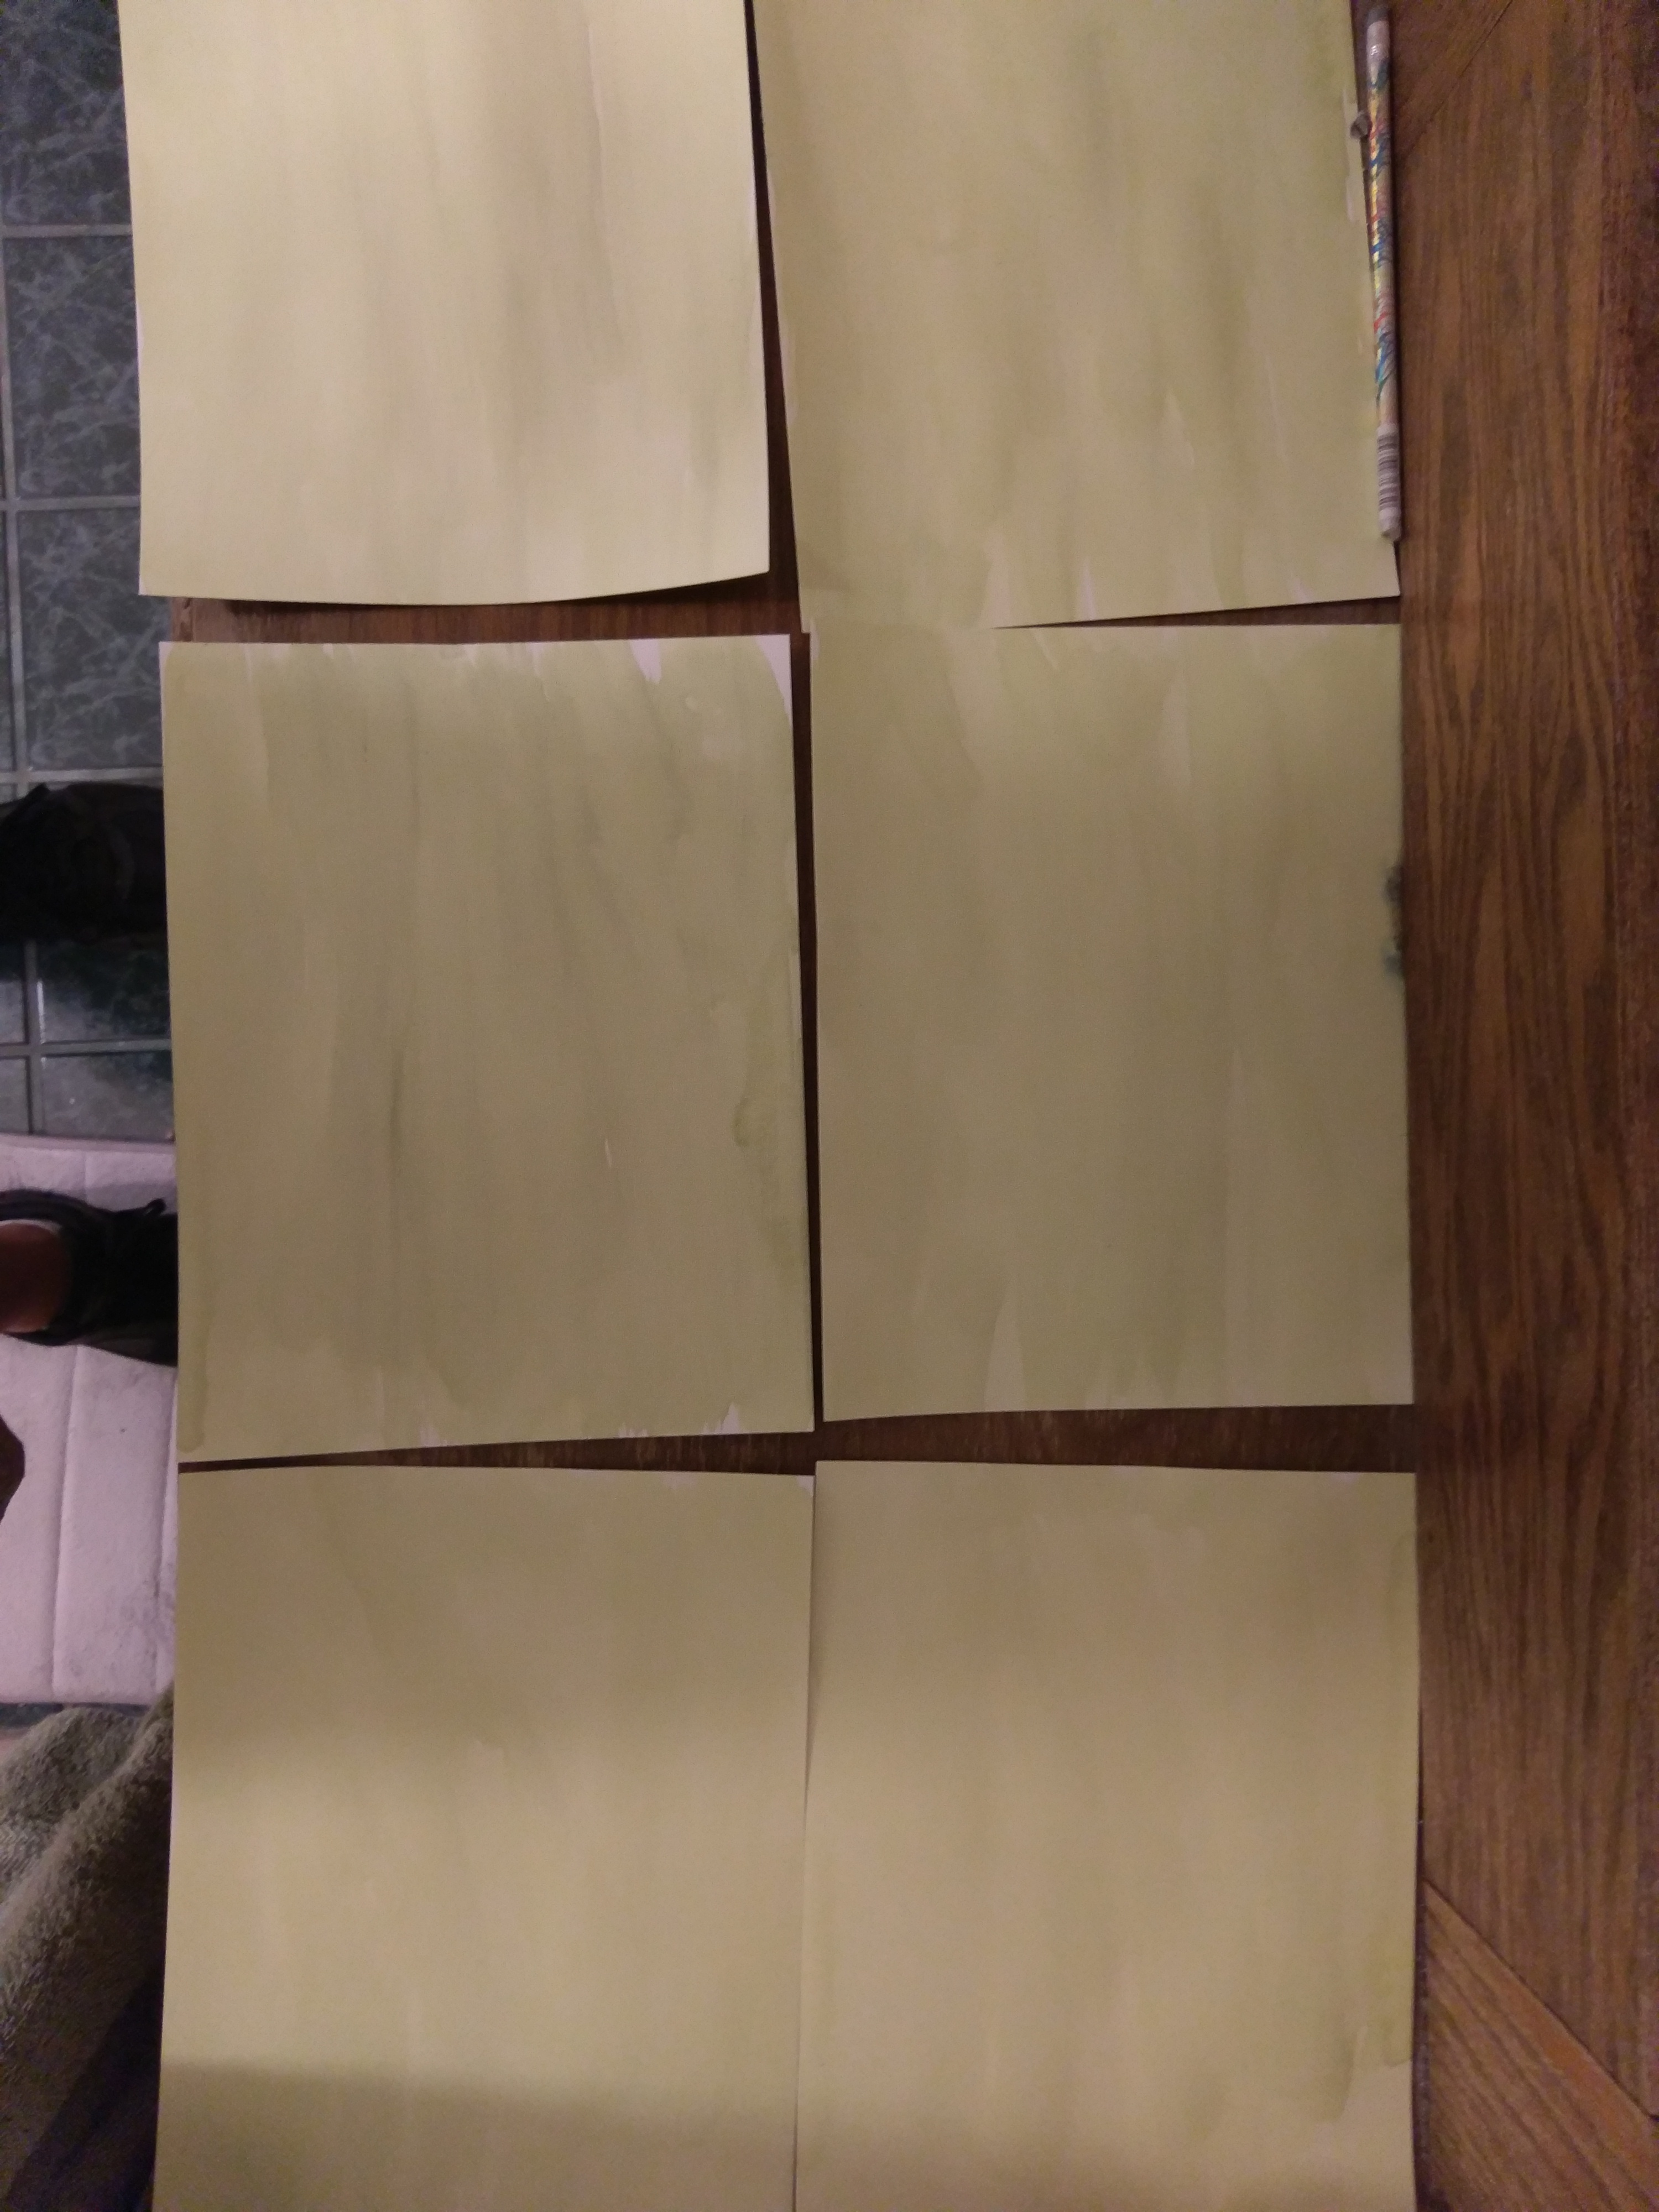
Treated paper, before exposure. Brush the mixture on a piece of art paper. (You can use a lot of different papers and fabrics.) I prepare 10 to 20 papers at a time.
- Use a foam brush for an even coat. Try using a bristle brush and leaving streaks in the coating for a unique look.
- Use a bathroom with no windows. Normal room lights are okay, but avoid exposure to UV light.
- Wrap the dry papers in a black plastic garbage bag to keep them from becoming exposed to the sun.
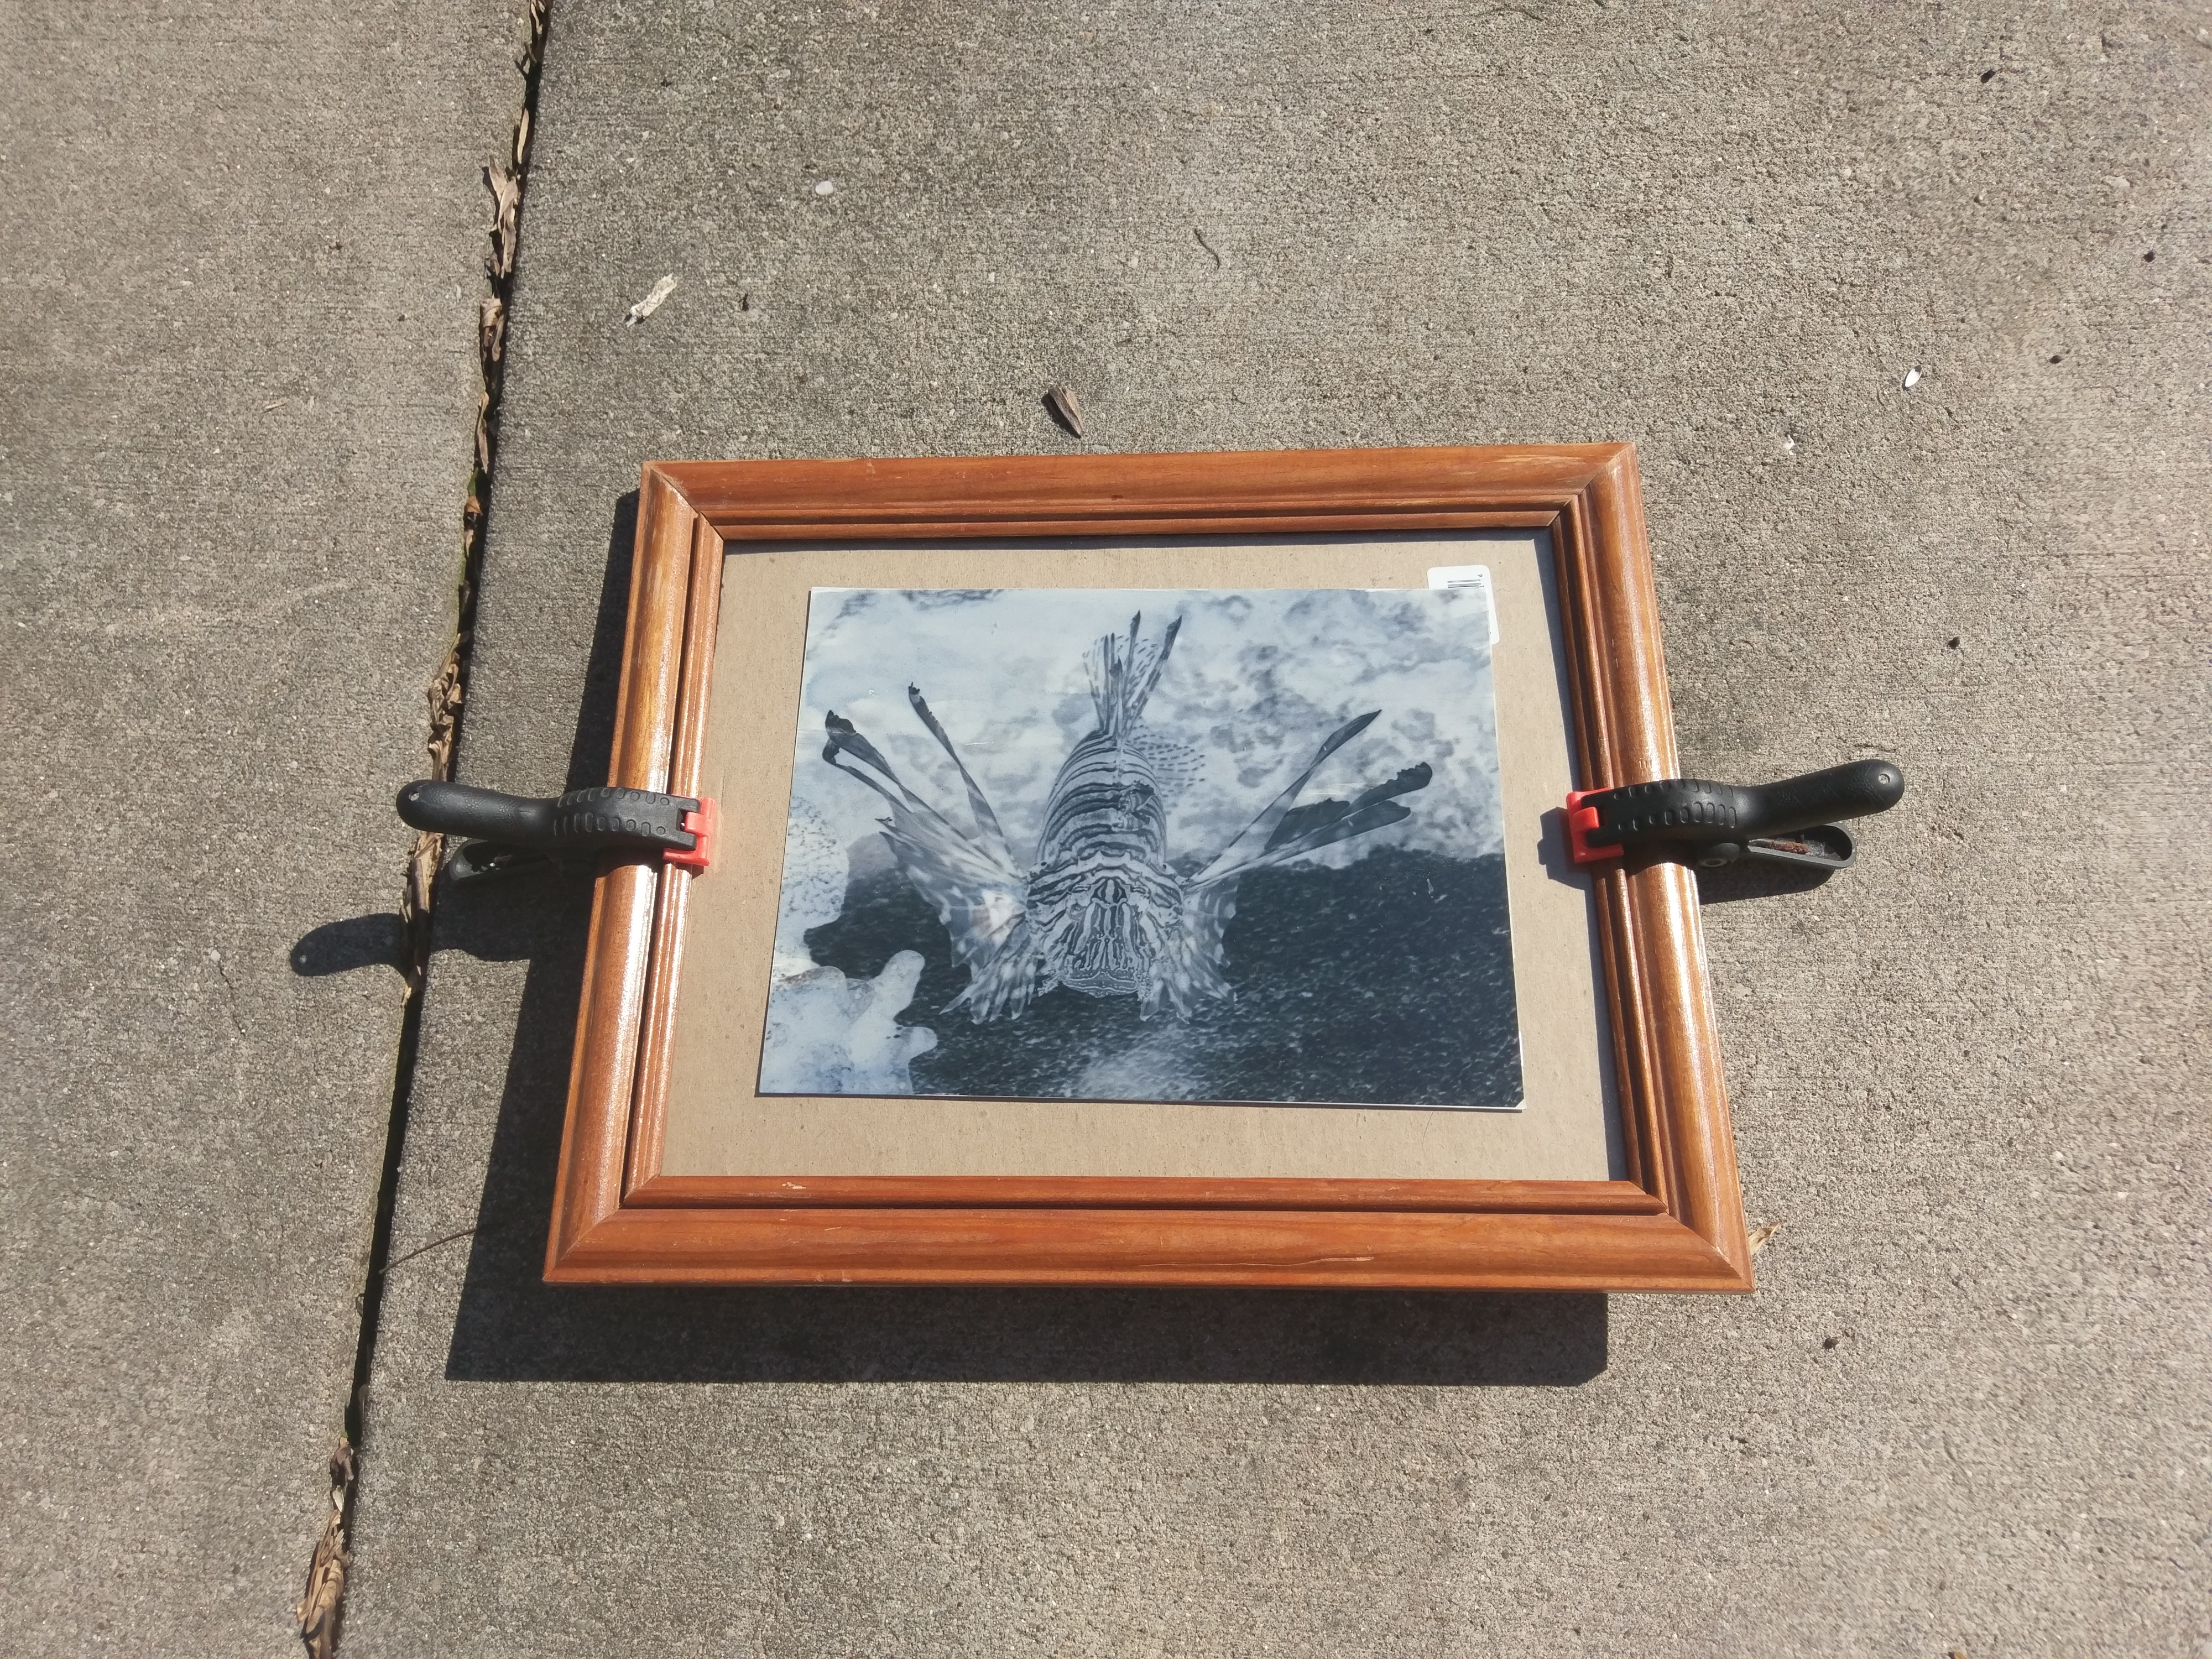
- Place a negative on top of the cyanotype paper and set it in the sun.
- Exposure takes five to 10 minutes, depending on the sun.
- Use an old picture frame, or a darkroom contact printer, to compress the negative to the paper for the sharpest print.
- If it is too light, repeat the process, but increase the time in the sun.
- Stop the exposure by soaking the print in fresh, running water. No “fixer” is necessary.
- Let the print dry and enjoy.
- Noon sun will give the sharpest image, but other times of day when the sun changes angles will change how your prints look.
Where to find the materials
Cyanotype Chemical kits are available through Photographers Formulary for $24.95. The description says it produces 25 to 50 prints, but my experience has been it produces many more prints than that.
For the acetate paper, I use Pictorico Premium OHP Transparency Film available through B and H photo online or your local specialty photo store. It is designed for use with Inkjet printers.
For the prints, I use a variety of art papers, available through your local arts and crafts store. I’ve recently been using a white, acid-free card stock for scrapbooking. Different papers give different textures to the image.